
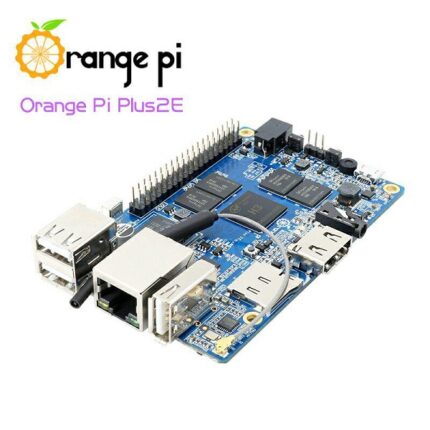
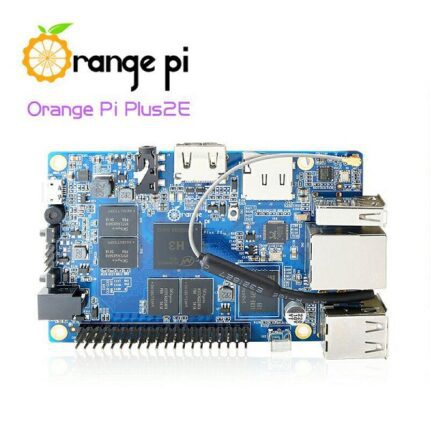
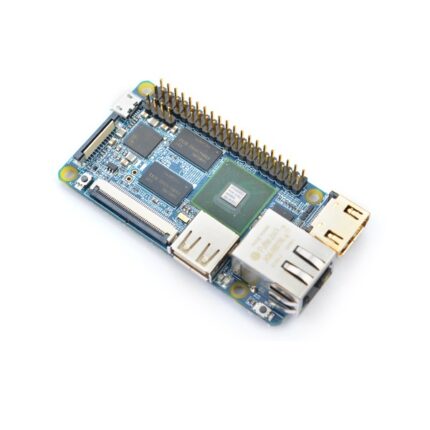
کامپیوتر Orange Pi Mini 2
۰ تومان
Orange Pi Mini 2 چیست؟
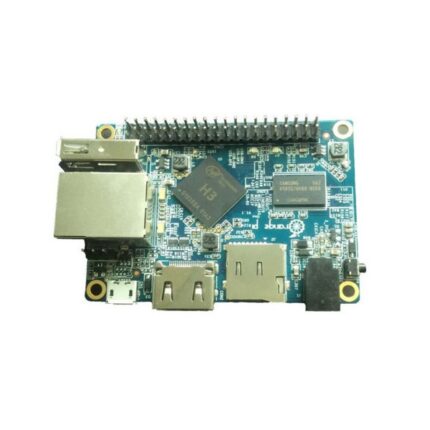
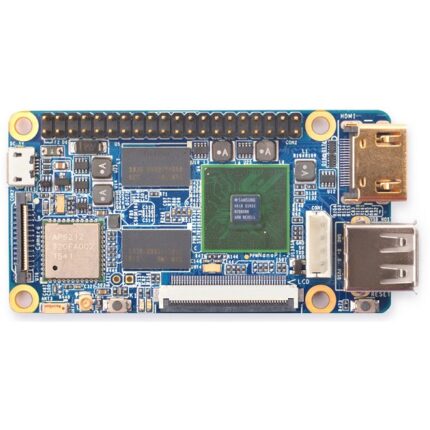
این یک کامپیوتر تک صفحه ای منبع باز است. می تواند اندروید 4.4 ، اوبونتو ، دبیان ، رزبری پای تصویر و همچنین موز پی تصویر را اجرا کند. این دستگاه از AllWinner H3 SoC استفاده می کند و دارای 1 گیگابایت SDRAM DDR3 است.
در انبار موجود نمی باشد
Orange Pi Mini 2 چیست؟
این یک کامپیوتر تک صفحه ای منبع باز است. می تواند اندروید 4.4 ، اوبونتو ، دبیان ، رزبری پای تصویر و همچنین موز پی تصویر را اجرا کند. این دستگاه از AllWinner H3 SoC استفاده می کند و دارای 1 گیگابایت SDRAM DDR3 است.
راهنمای شروع سریع Orange Pi Mini 2:
با پیروی از این راهنمای کوتاه راه اندازی سریع ، می توانید از Orange Pi Mini 2 خود فقط در چند دقیقه استفاده کنید. سه مرحله برای راه اندازی Orange Pi Mini 2 وجود دارد.
مرحله 1: آنچه را که نیاز دارید به دست آورید.
برای لذت بردن از استفاده از Orange Pi Mini 2 خود ، حداقل به لوازم جانبی موجود در جدول زیر نیاز دارید.
| No. | Item | Minimum recommended specification & notes |
| 1 | TF card |
|
| 2a | HDMI(Full sized) to HDMI / DVI lead |
|
| 2b | AV video lead |
|
| 3 | Keyboard and mouse |
|
| 4 | Ethernet cable/USB WiFi(Optional) |
|
| 5 | DC power adapter |
|
| 6 | Audio lead (Optional) |
|
| 7 | Mobile Hard disk (Optional) |
|
مرحله 2: کارت TF خود را برای Orange Pi Mini 2 آماده کنید.
برای لذت بردن از Orange Pi Mini 2 خود ، باید یک سیستم عامل (OS) را روی کارت TF نصب کنید. دستورالعمل های زیر به شما آموزش می دهد که چگونه در سیستم عامل Windows و Linux یک تصویر سیستم عامل روی کارت TF خود بنویسید.
Windows:
کارت TF خود را در رایانه خود قرار دهید. اندازه TF باید بزرگتر از اندازه تصویر سیستم عامل باشد ، به طور کلی 4 گیگابایت یا بیشتر.
کارت TF را فرمت کنید.
ابزار قالب کارت TF مانند TF Formatter را از اینجا بارگیری کنید.
https://www.sdcard.org/downloads/formatter_4/eula_windows/
فایل بارگیری را از حالت فشرده خارج کرده و setup.exe را اجرا کنید تا ابزار روی دستگاه شما نصب شود.
در منوی “Options” ، گزینه “FORMAT TYPE” را روی “QUICK” ، “FORMAT SIZE ADJUSTMENT” را روی “ON” قرار دهید.
بررسی کنید که کارت TF ای که وارد کرده اید با کارت انتخاب شده توسط Tool مطابقت داشته باشد.
روی دکمه “قالب بندی” کلیک کنید.
تصویر سیستم عامل را از صفحه بارگیری بارگیری کنید.
برای دریافت تصویر سیستم عامل ، فایل بارگیری را از حالت فشرده خارج کنید (تصویر سیستم عامل اندروید را حذف کنید ، تصویر سیستم عامل اندروید به حالت رایت دیگر نیاز دارد.)
روی فایل راست کلیک کرده و “Extract all” را انتخاب کنید.
فایل تصویر را روی کارت TF بنویسید.
ابزاری را که می تواند تصاویر را به کارت TF متصل کند ، مانند Win32 Diskimager را از آدرس http: //sourceforge.net/projects/win32diskimager/files/Archive/ بارگیری کنید.
فایل تصویری فشرده نشده را باز کنید.
روی دکمه “نوشتن” کلیک کنید. صبورانه منتظر بمانید تا نوشتن با موفقیت انجام شود.
Linux:
کارت TF خود را در رایانه خود قرار دهید. اندازه TF باید بزرگتر از اندازه تصویر سیستم عامل باشد ، به طور کلی 4 گیگابایت یا بیشتر.
کارت TF را فرمت کنید.
دستور fdisk –l/dev/sdx را برای بررسی گره کارت TF اجرا کنید.
umount /dev /sdxx را برای جدا کردن همه پارتیشن های کارت TF اجرا کنید.
برای پیکربندی کارت TF sudo fdisk /dev /sdxcommand را اجرا کنید. از دستور o برای حذف تمام پارتیشن کارت TF و از دستور n برای افزودن یک پارتیشن جدید استفاده کنید. برای ذخیره تغییرات از دستور w استفاده کنید.
دستور sudo mkfs.vfat /dev /sdx1 را برای قالب بندی پارتیشن جدید ایجاد شده کارت TF به عنوان FAT32 اجرا کنید.
(x باید با توجه به گره کارت TF شما جایگزین شود)
همچنین می توانید این مرحله را در لینوکس انجام دهید ، زیرا نوشتن دستور تصویر dd تحت لینوکس ، کارت TF را به صورت خودکار فرمت می کند.
تصویر سیستم عامل را از صفحه بارگیری بارگیری کنید.
برای دریافت تصویر سیستم عامل ، فایل بارگیری را از حالت فشرده خارج کنید (تصویر سیستم عامل اندروید را حذف کنید ، تصویر سیستم عامل اندروید به حالت رایت دیگر نیاز دارد.)
دستور unzip [path]/[downloaded filename] را اجرا کنید.
اگر پسوند نام فایل .tgz است ، دستور tar zvxf [path]/[downloaded filename] را اجرا کنید.
اطمینان حاصل کنید که نه نام فایل تصویری که استفاده می کنید و نه مسیر هیچ فاصله ای (یا سایر کاراکترهای عجیب و غریب) ندارد.
فایل تصویر را روی کارت TF بنویسید.
برای بررسی گره کارت TF دستور sudo fdisk –l/dev/sdx را اجرا کنید.
بررسی کنید که آیا کلید هش فایل zip همان است که در صفحه بارگیری ها نشان داده شده است (اختیاری).
sha1sum [مسیر]/[نام تصویر]
این یک شماره شش ضلعی طولانی را چاپ می کند که باید با خط “SHA-1” برای تصویر TF که بارگیری کرده اید مطابقت داشته باشد.
umount /dev /sdxx را اجرا کنید تا تمام پارتیشن کارت TF را جدا کنید
sudo dd bs = 4M if = [path]/[imagename] دستور =/dev/sdx را برای نوشتن فایل تصویر در کارت TF اجرا کنید. صبورانه منتظر بمانید تا نوشتن با موفقیت انجام شود. لطفاً توجه داشته باشید که اندازه بلوک که روی 4M تنظیم شده است بیشتر اوقات کار می کند ، اگر نه ، لطفا 1M را امتحان کنید ، اگرچه 1M به طور قابل توجهی بیشتر طول می کشد. برای بررسی پیشرفت می توانید از دستور sudo pkill –USR1 –n –x dd استفاده کنید.
(x باید با توجه به گره کارت TF شما جایگزین شود)
مرحله 3: Orange Pi Mini 2 خود را راه اندازی کنید
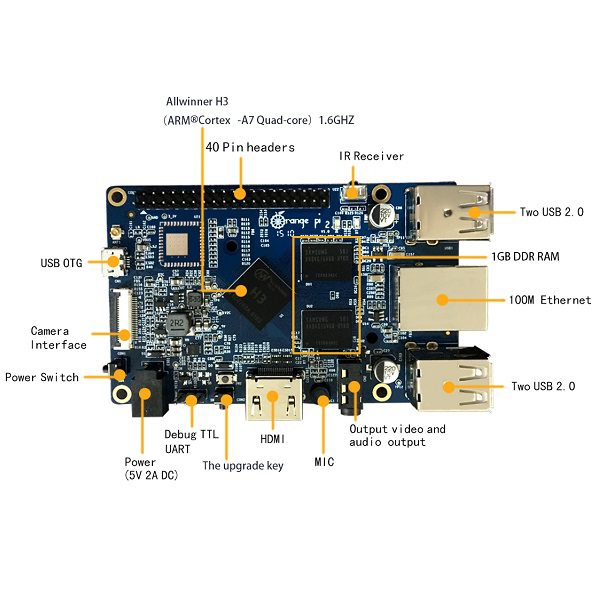
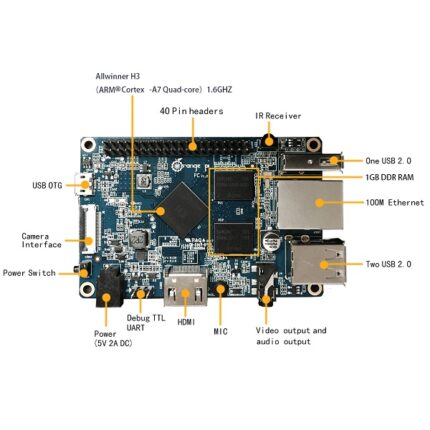
با توجه به نمودار تنظیم زیر ، می توانید Orange Pi Mini 2 خود را به راحتی راه اندازی کنید.
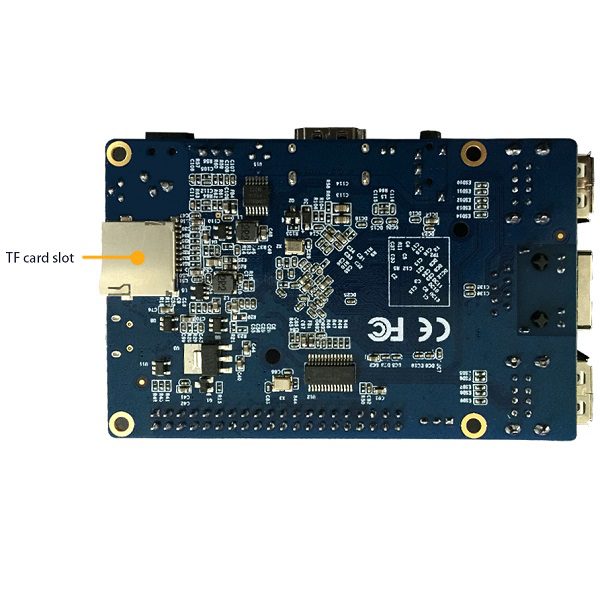
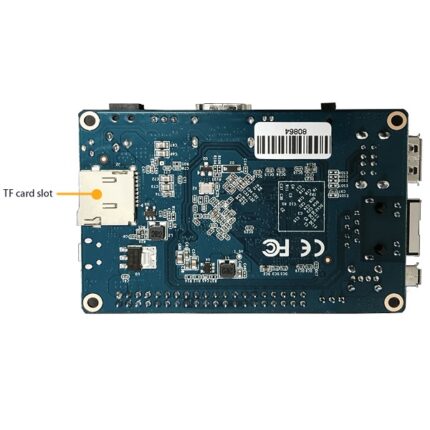
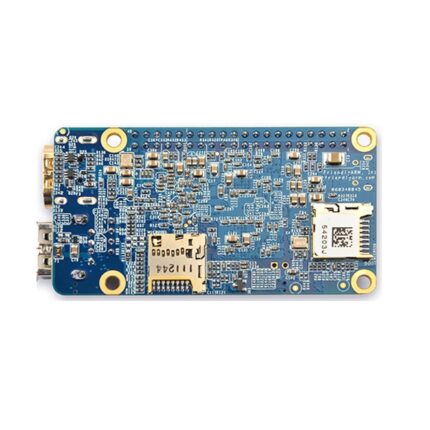
کارت TF تصویر نوشته شده را در شکاف کارت TF در لبه سمت چپ بالای صفحه قرار دهید.
در لبه پایینی در وسط برد ، پورت HDMI Type A (اندازه کامل) ، درست در سمت راست درگاه SATA قرار دارد. فقط هر کابل HDMI نوع A را از برد به تلویزیون یا مانیتور HDMI خود وصل کنید.
اگر تلویزیون/مانیتور با درگاه HDMI یا DVI-D ندارید ، می توانید از جک AV واقع در لبه سمت راست بالای USB HOST استفاده کنید.
یک صفحه کلید و ماوس USB را به شکاف های USB واقع در لبه سمت راست وصل کنید.
درست در زیر درگاه های USB در لبه سمت راست ، اتصال اترنت برای هر کسی که می خواهد Orange Pi Mini 2 را به یک شبکه سیمی متصل کند ، وجود دارد. همچنین می توانید از wifi برای اتصال شبکه استفاده کنید.
سرانجام ، در وسط لبه سمت چپ اتصال برق DC قرار دارد. یک منبع تغذیه تنظیم شده با 5V ± 5٪ و حداقل 1500mA (یا 2.0A) را وصل کنید. هر عددی بزرگتر از 1500 میلی آمپر نیز کار می کند.
توجه: از اتصال برق میکرو یو اس بی خودداری کنید ، زیرا تغذیه میکرو یو اس بی منبع تغذیه نیست.
اگر هارد دیسک 2.5 اینچی رایگان دارید ، می توانید آن را در Orange Pi Mini 2 استفاده کنید. کابل SATA را در سمت چپ HDMI به پورت SATA وصل کنید. به یاد داشته باشید که کابل برق را با 2 سر 2.54 میلی متری نر به برق SATA وصل کنید. سپس می توانید هارد دیسک خود را به طرف دیگر کابل SATA وصل کنید. در اتصال کابل های رنگی مختلف دقت کنید. (این مرحله قابل رد شدن است)
اگر همه چیز خوب پیش برود ، Orange Pi Mini 2 چند دقیقه دیگر راه اندازی می شود. روی صفحه نمایش رابط کاربری سیستم عامل (Graphical User Interface) نمایش داده می شود. اولین بوت سیستم عامل جدید گاهی اوقات به طول می انجامد. صبور باش! چکمه های بعدی معمولاً بسیار سریعتر هستند.
مرحله 4: Orange Pi Mini 2 خود را خاموش کنید
برای خاموش کردن ایمن Orange Pi Mini 2 می توانید از رابط کاربری گرافیکی استفاده کنید.
همچنین می توانید دستور را در ترمینال اجرا کنید:
توقف sudo
یا
sudo shutdown –h now
با این کار PI با خیال راحت خاموش می شود (فقط برای خاموش کردن از کلید پاور استفاده کنید ممکن است به سیستم فایل کارت های TF آسیب برساند). پس از آن می توانید کلید پاور را برای 5 ثانیه فشار دهید تا خاموش شود.
What’s Orange Pi Mini 2?
It’s an open-source single-board computer. It can run Android 4.4, Ubuntu, Debian, Rasberry Pi Image, as well as the banana pi Image. It uses the AllWinner H3 SoC, and has 1GB DDR3 SDRAM.
Orange Pi Mini 2 Quick Start Guide
By following this short quick start guide, you can use your Orange Pi Mini 2 in just a few minutes. There are three steps to boot your Orange Pi Mini 2.
Step 1: Get what you need.
To enjoy the use of your Orange Pi Mini 2, you will need at least the accessories in the table below.
| No. | Item | Minimum recommended specification & notes |
| 1 | TF card |
|
| 2a | HDMI(Full sized) to HDMI / DVI lead |
|
| 2b | AV video lead |
|
| 3 | Keyboard and mouse |
|
| 4 | Ethernet cable/USB WiFi(Optional) |
|
| 5 | DC power adapter |
|
| 6 | Audio lead (Optional) |
|
| 7 | Mobile Hard disk (Optional) |
|
In order to enjoy your Orange Pi Mini 2, you will need to install an Operating System (OS) onto an TF card. Instructions below will teach you how to write an OS image to your TF card under Windows and Linux.Step 2: Prepare your TF card for the Orange Pi Mini 2
Windows:
- Insert your TF card into your computer. The size of TF should be larger than the OS image size, generally 4GB or greater.
- Format the TF card.
- Download the a TF card format tool such as TF Formatter from
https://www.sdcard.org/downloads/formatter_4/eula_windows/ - Unzip the download file and run the setup.exe to install the tool on your machine.
- In the “Options” menu, set “FORMAT TYPE” option to QUICK, “FORMAT SIZE ADJUSTMENT” option to “ON”.
- Check that the TF card you inserted matches the one selected by the Tool.
- Click the “Format” button.
- Download the a TF card format tool such as TF Formatter from
- Download the OS image from the Downloads webpage.
- Unzip the download file to get the OS image (exclude android os image,android os image need other burn mode.).
- Right click on the file and choose “Extract all”.
- Write the image file to the TF card.
- Download a tool that can wirte images to an TF card, such as Win32 Diskimager from:http://sourceforge.net/projects/win32diskimager/files/Archive/
- Open the unzipped image file.
- Click “Write” button. Wait patiently to successfully complete writing.
Linux:
- Insert your TF card into your computer. The size of TF should be larger than the OS image size, generally 4GB or greater.
- Format the TF card.
- Run fdisk –l /dev/sdx command to check the TF card node.
- Run umount /dev/sdxx to unmount all the partitions of the TF card.
- Run sudo fdisk /dev/sdxcommand to configure TF card. Use o command to delete all partition of TF card and use n command to add one new partition. Use w command to save change.
- Run sudo mkfs.vfat /dev/sdx1 command to format the new created partition of TF card as FAT32.
(x should be replaced according to your TF card node)
You can also jump this step under Linux, because write image command dd under Linux will format the TF card automatically.
- Download the OS image from the Downloads webpage.
- Unzip the download file to get the OS image (exclude android os image,android os image need other burn mode.).
- Run unzip [path]/[downloaded filename] command.
If the filename extension is .tgz, run tar zvxf [path]/[downloaded filename] command.
Ensure that neither the file name of the image you’re using or the path contain any spaces (or other odd characters, for that matter).
- Run unzip [path]/[downloaded filename] command.
- Write the image file to the TF card.
- Run sudo fdisk –l /dev/sdx command to check the TF card node.
- Verify if the hash key of the zip file is the same as shown on the downloads page (optional).
sha1sum [path]/[imagename]
This will print out a long hex number which should match the “SHA-1” line for the TF image you have downloaded. - Run umount /dev/sdxx to unmount all the partition of the the TF card
- Run sudo dd bs=4M if=[path]/[imagename] of=/dev/sdx command to write image file to TF card. Wait patiently to successfully complete writing. Please note that block size set to 4M will work most of the time, if not, please try 1M, although 1M will take considerably longer.You can use sudo pkill –USR1 –n –x dd command to check progress
(x should be replaced according to your TF card node)
Step 3: Set up your Orange Pi Mini 2
According to the set up diagram below, you can easily set up your Orange Pi Mini 2.
- Insert the written-image TF card into the TF card slot on the left side edge of the upside of the board.
- On the bottom edge in the middle of the board is the HDMI Type A (Full sized) port, just on the right of the SATA port. Just connect any HDMI Type A cable from the board to your TV or HDMI Monitor.
If you don’t have an TV/Monitor with a HDMI or DVI-D port you can use the AV jack located on the right edge above USB HOSTs. - Plug a USB keyboard and mouse into the USB slots located on the right edge.
- Just under the USB ports on the right edge is the ethernet connector for anyone who wants to plug the Orange Pi Mini 2 into a wired network. You can also use wifi to connect network.
- Finally, at the middle of the left edge is the DC power connector. Plug in a regulated power supply that is rated at 5V ±5% and at least 1500mA (or 2.0A). Any number bigger than 1500 mA will also work.
Note : Avoid using the micro-usb power connector, because micro-usb power does not supply power.
- If you have a free 2.5 inch hard drive, you can put it into use on Orange Pi Mini 2. Connect the SATA cable to the SATA port just on the left of HDMI. Remember to put the power cable with 2 male 2.54mm headers into the SATA power. Then you can plug your hard drive into the other side of the SATA cable. Be careful with the connection of different color cables. (This step can be skipped)
If all goes well, the Orange Pi Mini 2 will boot in a few minutes. The screen will display the OS GUI(Graphical User Interface). The first boot of a new OS can sometimes take a long time. Be patient! Subsequent boots are usually much quicker.
Step 4: Shut down your Orange Pi Mini 2
You can use the GUI to shut down the Orange Pi Mini 2 safely.
Also you can run the command in the terminal:
sudo halt
or
sudo shutdown –h now
This will shut down the PI safely, (just use the power key to turn off might damage the TF-cards file system). After that you can press the power key for 5 seconds to turn it off.
کامپیوتر orange PI Mini 2
| Hardware specification | ||
| CPU | H3 Quad-core Cortex-A7 H.265/HEVC 4K | |
| GPU | ·Mali400MP2 GPU @600MHz ·Supports OpenGL ES 2.0 |
|
| Memory (SDRAM) | 1GB DDR3 (shared with GPU) | |
| Onboard Storage | TF card (Max. 64GB) / MMC card slot | |
| Onboard Network | 10/100M Ethernet RJ45 | |
| Video Input | A CSI input connector Camera:
Supports 8-bit YUV422 CMOS sensor interface Supports CCIR656 protocol for NTSC and PAL Supports SM pixel camera sensor Supports video capture solution up to 1080p@30fps |
|
| Audio Input | MIC | |
| Video Outputs | Supports HDMI output with HDCP
Supports HDMI CEC Supports HDMI 30 function Integrated CVBS Supports simultaneous output of HDMI and CVBS |
|
| Audio Output | 3.5 mm Jack and HDMI | |
| Power Source | DC input can supply power, but USB OTG input don’t supply power | |
| USB 2.0 Ports | Four USB 2.0 HOST, one USB 2.0 OTG | |
| Buttons | Power Button(SW4), Recovery Button(SW2)
UBoot Button(SW3) |
|
| Low-level peripherals | 40 Pins Header, compatible with Raspberry Pi B+ | |
| GPIO(1×3) pin | UART, ground. | |
| LED | Power led & Status led | |
| Key | IR input,UBOOT,POWER | |
| Supported OS | Android Ubuntu, Debian, Raspberry Pi Image | |
| Interface definition | ||
| Product size | 93 mm × 60mm | |
| Weight | 45g | |


دیدگاهها
هیچ دیدگاهی برای این محصول نوشته نشده است.